How to Set Up Your First Shopify Dropshipping Store with Spocket in Under an Hour?
Learn how to set up your first Shopify dropshipping store with Spocket in under an hour. We make it super easy and you can follow along.

You can go from “no store” to “first Shopify dropshipping store with Spocket” in under an hour if you don’t overthink stuff and just follow a clean flow. This write‑up walks you through that exact flow, from setting up Shopify to connecting Spocket and pushing your first products live. We’ll keep it friendly, not super technical. If you’ve never touched Shopify before, that’s fine. By the end, you’ll have a working store that can actually take orders.
Step 1: Get clear on what you’re doing
Dropshipping means you sell products online without keeping any stock yourself. Someone orders on your Shopify store, the supplier ships directly to the customer, and you keep the price difference as profit. Your job is mainly setting up the store, picking products, and driving traffic.
Spocket sits in between your Shopify store and a network of suppliers, mostly in the US and EU plus a few other regions. You import products from Spocket into Shopify; when orders come in, Spocket forwards them to suppliers and syncs tracking and inventory for you.
Step 2: Create your Shopify account (5–10 minutes)
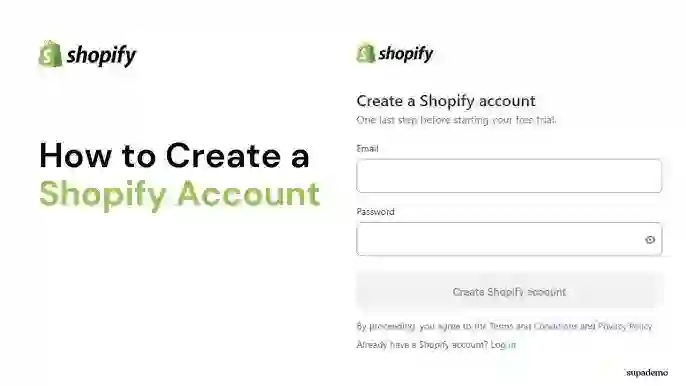
- Go to Shopify’s site and start the free trial.
- Enter your email, password, and store name.
- Answer the basic questions (“Are you already selling?” etc.) or skip them.
- Pick the Basic plan when prompted; you can always upgrade later.
Shopify only charges you once the trial ends, but you’ll still need to enter card details to keep the store open after that. You’ll land in the Shopify admin where you see menus for Orders, Products, Customers, and so on.
For now, don’t get lost in themes and design. You just need a working store, not your final brand.
Step 3: Pick a quick niche and name
Don’t spend three days naming this thing. You can always rebrand later.
Good niches usually sit at the intersection of:
- Something you don’t hate talking about
- Products people already buy every month
- A price point that lets you add a decent margin without looking silly
A few spaces that work well with Spocket’s catalog:
- Fashion and accessories (for example women’s clothing), which you can browse here when you’re researching:
- Tech accessories like chargers, cases, and small gadgets:
- Toys and kids’ products.
- Pet supplies, which are great for repeat orders.
- Sports and outdoor gear.
If you want a quick reality check on whether dropshipping itself is still worth doing, Spocket’s main site has a good high‑level explanation of the model and why fast shipping matters:.
Once you’ve got a niche, use something short and pronounceable as your store name. Don’t overcomplicate it.
Step 4: Install Spocket on your Shopify store (5 minutes)
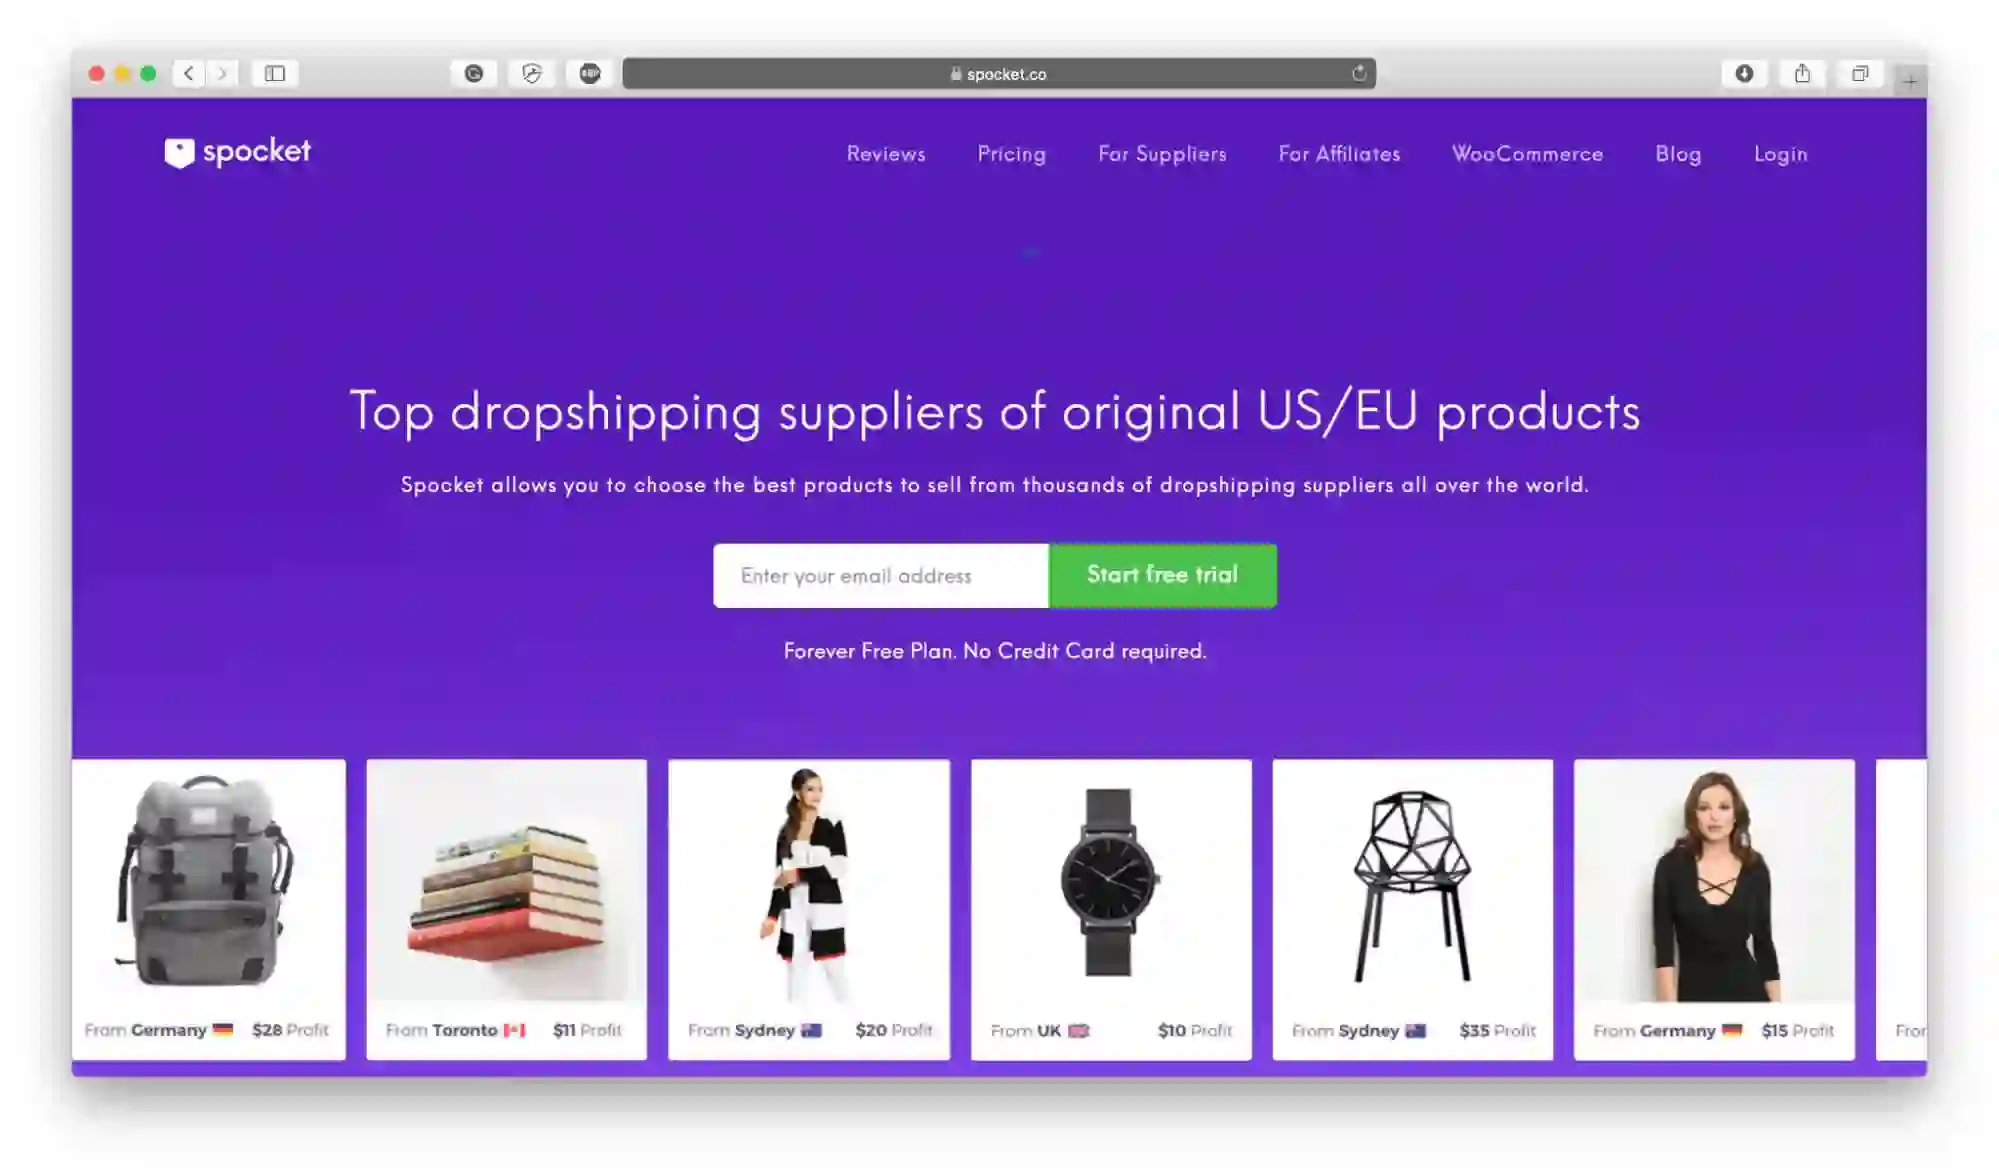
There are two main ways to connect Spocket with Shopify; both land in the same place.
Option 1 – From Spocket’s side
- Create your account on Spocket here once you’re ready.
- After logging in, click “Shop” on the left, choose Shopify, and paste your store URL (something like yourstore.myshopify.com).
- Spocket will send you back to Shopify to approve the connection.
Option 2 – From Shopify’s App Store
- From your Shopify admin, open “Apps”, then “Shopify App Store”.
- Search for “Spocket: US & EU Dropshipping” and click through to the app listing.
- Hit “Add app”, approve permissions, and you’ll be redirected into the Spocket dashboard.
Either way, you’ll end up inside Spocket with your Shopify store linked.
Step 5: Choose a Spocket plan quickly
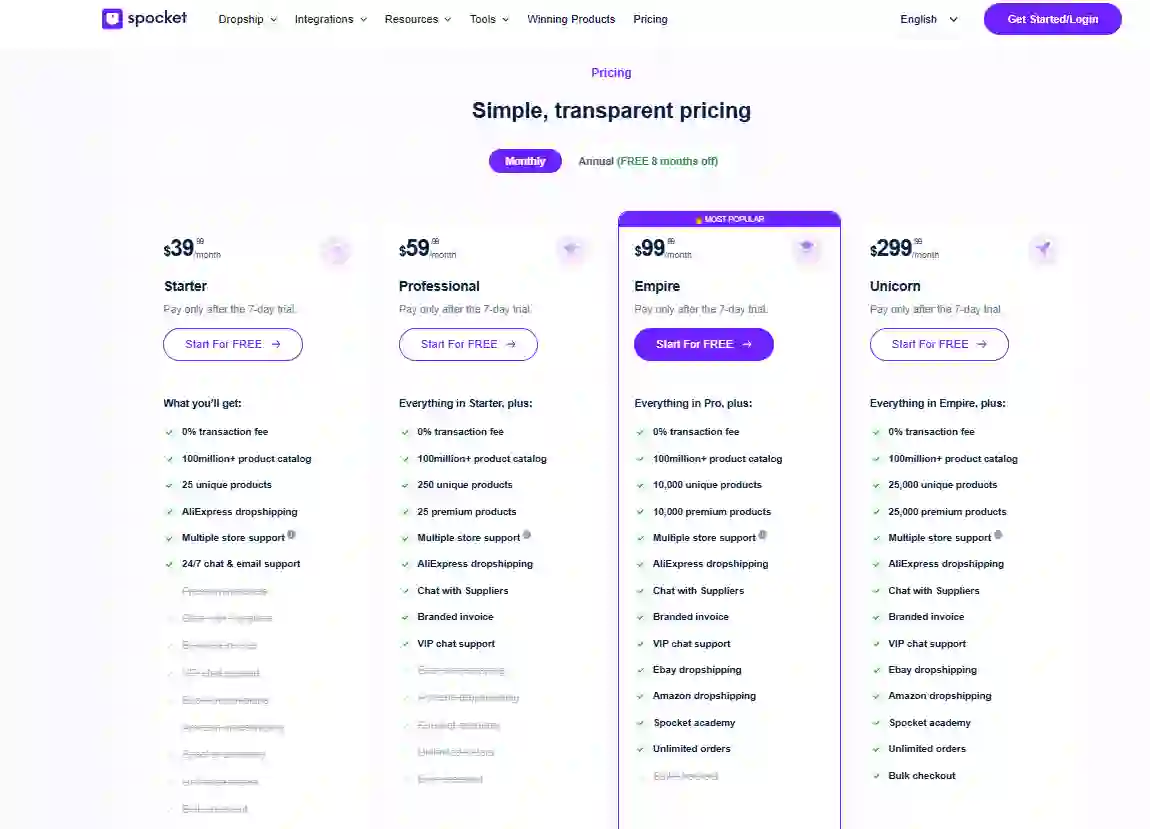
When you first open Spocket, you’ll see plan options like Starter, Professional, Empire, and Unicorn, with a free trial on top. All plans have 0% transaction fees from Spocket’s side and access to a large product catalog.
Starter works if you just want to test a small catalog; Professional and above unlock more products, premium suppliers, and branding perks. For current prices and limits, check Spocket’s pricing page once before you decide.
Pick something, start the trial, move on. You’re trying to launch a store, not write a thesis on plan comparison.
Step 6: Basic Spocket settings you should touch
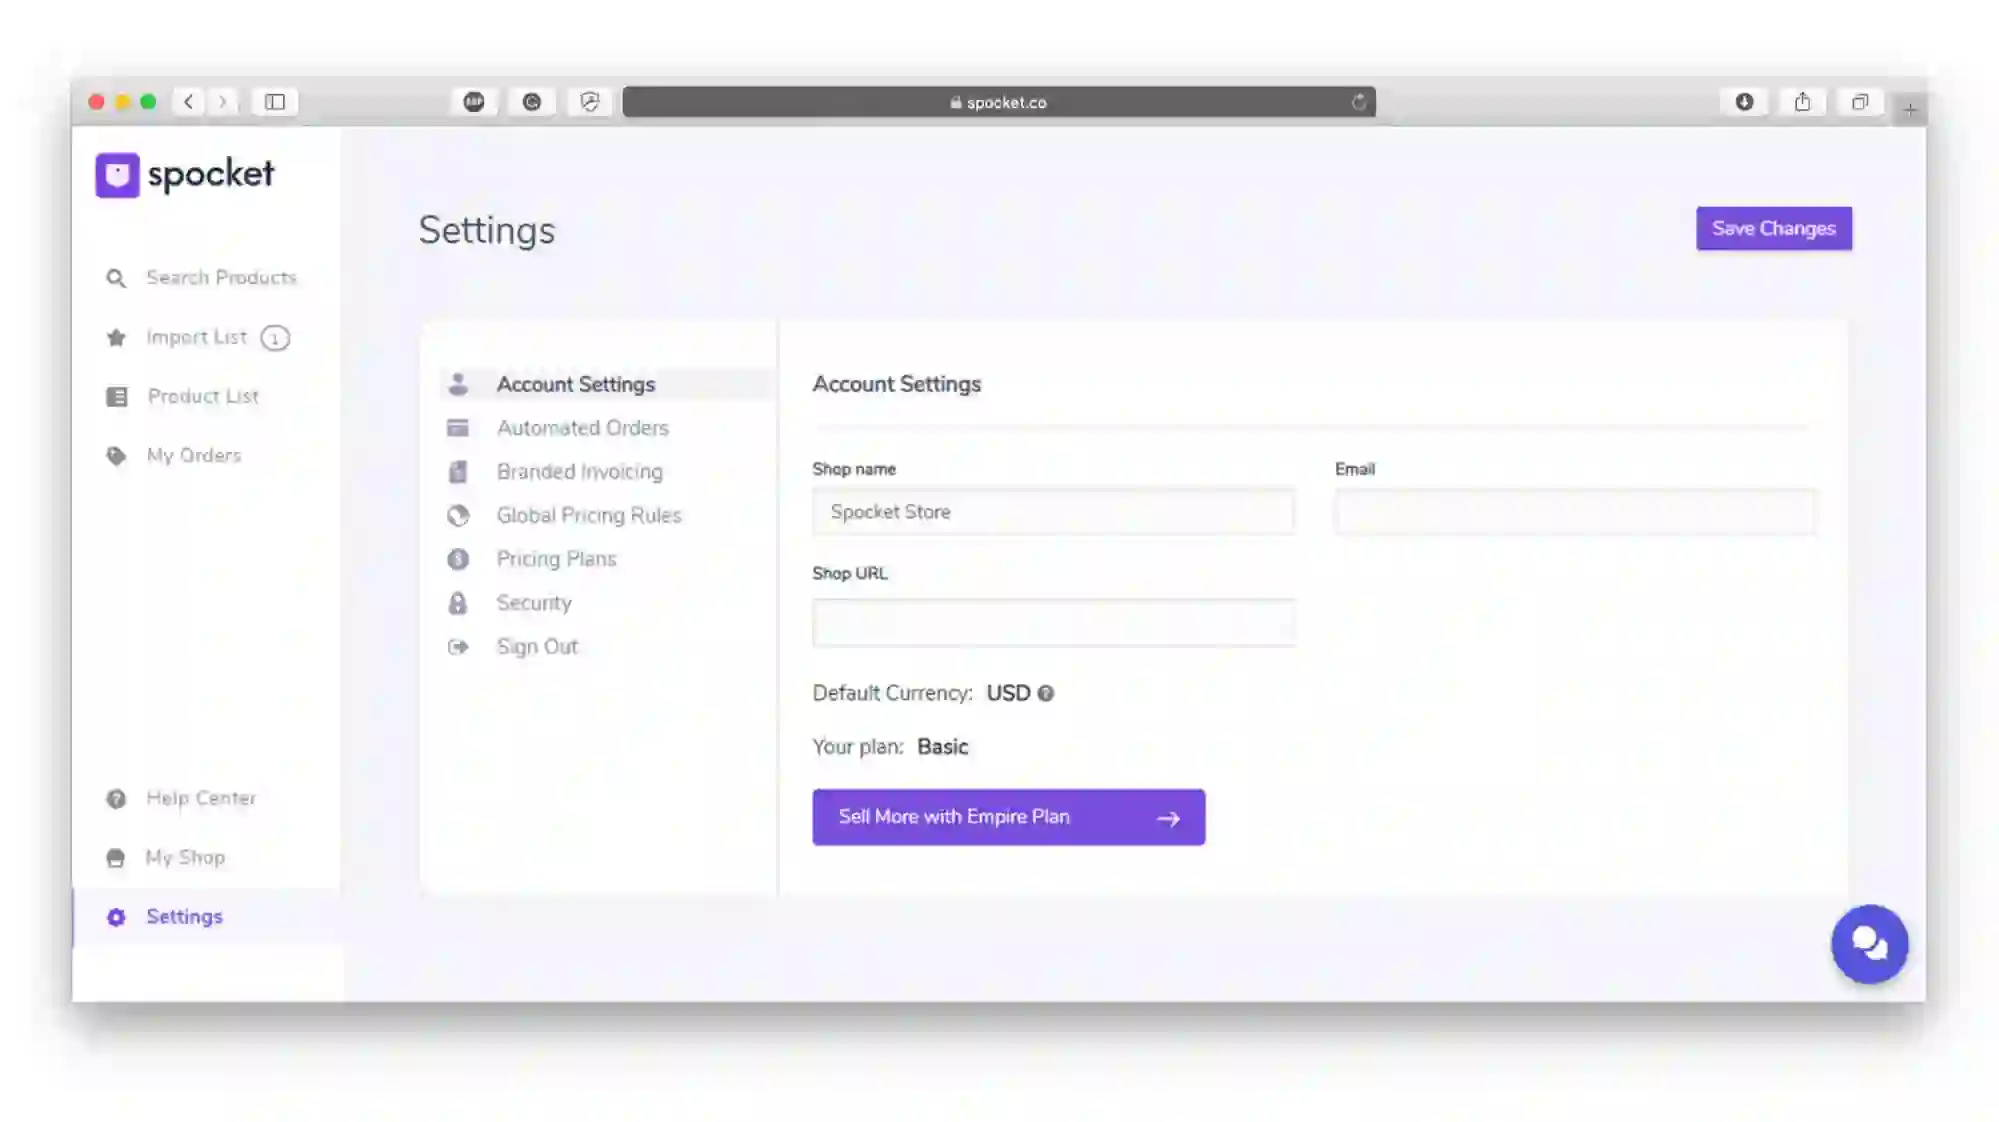
Inside Spocket, go to your account settings before importing anything.
- Set your store currency and main shipping region so pricing looks right for visitors.
- Turn on branded invoicing if your plan supports it, so customers see your logo on their paperwork instead of random supplier branding.
- Check the default pricing rules (for example, “multiply cost by X and add Y”); tweak them so you get a healthy margin after ads and fees.
This takes a few minutes but saves you from editing each product one by one later.
Step 7: Find products inside Spocket (10–15 minutes)
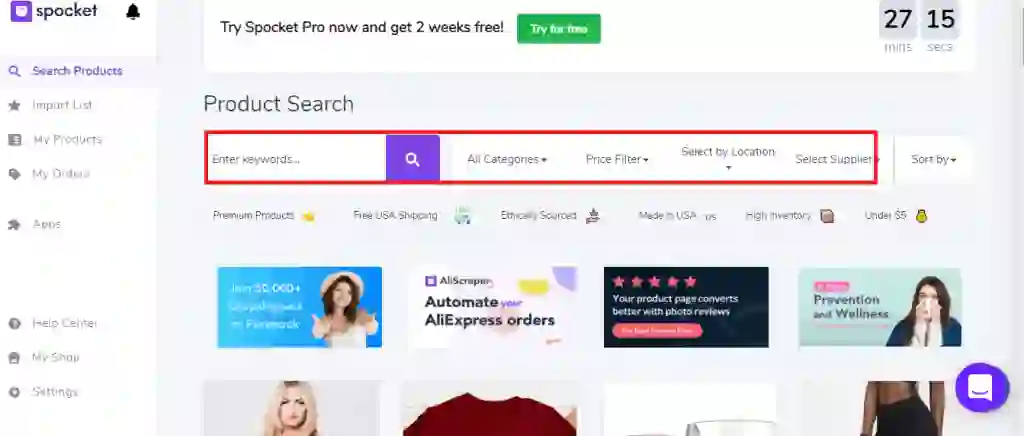
Now comes the fun part: picking what to sell.
On the left in Spocket, hit “Search Products”. You’ll see filters for category, price, and shipping location. Use these filters to match your niche and region.
A few tips:
- Use the “Ships from” filter to focus on suppliers in the US or EU if that’s where most of your buyers live; this usually means 2–7 day delivery instead of long waits.
- Sort by “Premium” or high rating if your plan includes premium suppliers; they tend to have better handling times and quality control.
- Look at the “Trending” or similar product tags. Spocket keeps a curated list of trending dropshipping products here.
If you want to mix print‑on‑demand with regular products (for example, custom shirts plus regular accessories), Spocket also lists dedicated POD suppliers.
Don’t over‑pick. For a first store, 10–20 products in one tight theme is plenty.
Step 8: Understand “no MOQs” and samples
Traditional wholesalers often force you to buy a minimum batch (like 50 or 100 units). Spocket works differently: you can place single orders without minimum order quantities, which is what people mean when they say Spocket has no MOQs.
This setup makes it easy to order samples for yourself and later place bulk orders only on proven winners.
So if a product looks promising but you’re nervous about quality, order one to your own address before pushing ad spend.
Step 9: Import products from Spocket to Shopify (5–10 minutes)
Once you’ve found a product you like in Spocket:
- Click it to open the detail view.
- Hit “Add to import list”.
- Go to your Import List inside Spocket.
- Edit the title, description, images, and pricing. Clean this text up to match your brand instead of leaving it stock.
- Choose the Shopify collection it should go into (or create one).
- Click “Push to store”.
After a short delay, the product appears in your Shopify admin under Products, with all variants and images synced. Repeat for your initial batch of products.
You can also enable automatic inventory sync so Spocket updates stock and price changes back to Shopify for you.
Step 10: Make your Shopify store not look like a default demo
Now switch back to the Shopify admin.
Pick a theme
- Go to Online Store → Themes.
- Start with a free theme (Dawn or any other you like).
- Click “Customize”.
The visual builder works mostly by clicking on sections (headers, banners, product grids) and editing them. Don’t sit here for two hours. Swap the default hero image, update the main heading, add one or two benefit bullets, then move on.
Create the must‑have pages
At minimum, add:
- Home
- Catalog / Shop
- About
- Contact
- Shipping / Refund policy
You can generate basic policy text using Shopify’s built‑in tools, then tighten it yourself. Add these pages to your main navigation under Online Store → Navigation so people can actually find them.
Step 11: Connect payments, shipping, and tax basics
Inside Shopify:
- Open Settings → Payments and turn on Shopify Payments or another provider available in your country.
- Add PayPal if you want that option; many buyers look for it.
- In Settings → Shipping and delivery, set at least one shipping zone and rate (for example, “Free shipping to US for orders over X”).
- For tax setup, follow Shopify’s prompts for your region; they handle a lot of the logic automatically, but you should double‑check with a local accountant if you’re unsure.
The goal is not a perfect tax setup today, just “customers can check out and see a clear shipping price”.
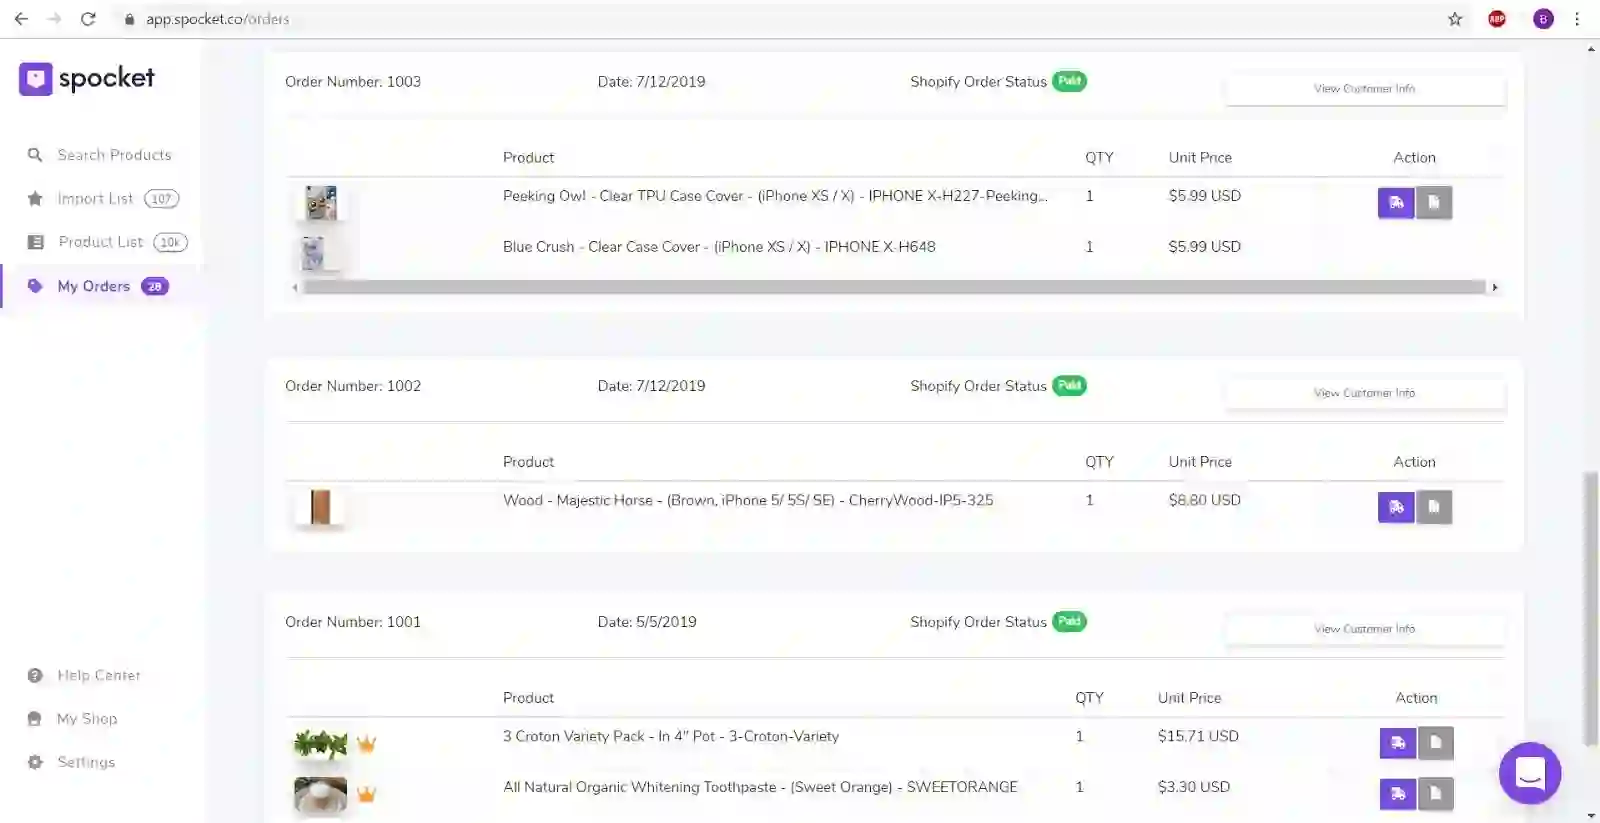
Step 12: Check how Spocket and Shopify talk to each other
Before you tell anyone about your store, run a quick end‑to‑end test.
- In Shopify, open one of the products you imported from Spocket and view it on your storefront.
- Add it to cart and go all the way to checkout.
- If you don’t want to charge your own card, create a 100% off test discount and apply it.
- Complete the order.
Now open Spocket and look at the Orders tab. You should see that order appear, ready to be processed. This confirms the connection is working.
Once you trust the sync, you can start sending real traffic and let Spocket handle order forwarding and tracking updates.
Step 13: Think about product research beyond day one
Your first products probably won’t be your last. That’s normal.
To keep finding good offers:
- Use Spocket’s catalog filters plus the trending view to spot products with strong order activity.
- Cross‑check them on Amazon, Etsy, and other marketplaces to see if they have solid reviews and recent demand.
- Use tools like Google Trends to see if interest is rising or falling over time.
Spocket’s own site shares broad product categories that work well—home and garden, gifts, jewelry, pets, toys, tech, sports and more—which matches what you see in their marketplace. Try to stay inside one theme per store instead of mixing ten unrelated categories.
Step 14: Where Spocket fits if you ever move beyond Shopify
This guide is about Shopify, but sometimes people ask if they’re stuck with Shopify forever. Short answer: no.
Spocket also connects to other store builders like Wix, WooCommerce, eBay, and BigCommerce, each through its own integration page. You can switch between any provider since it integrates with major e-commerce platforms.
For now, though, Shopify plus Spocket is more than enough.
Conclusion
You don’t need weeks to launch your first Shopify dropshipping store. If you keep things lean, you can pick a niche, spin up Shopify, connect Spocket, import 10–20 products, and place a test order in under an hour. From there, the real work is product research and traffic, not fiddling with small theme details. If you’re ready to try it, start your Shopify store, connect Spocket, run through the steps above, and give yourself a real chance to see that first order roll in.
Start your dropshipping business today
How to Set Up Shopify Dropshipping Store with Spocket FAQs
Do I need a registered company before I start?
Many beginners start as individuals and register a company later when they see some traction. You should still check rules in your country about taxes and business registration, since they vary a lot.
How many products should I launch on day one?
Ten to twenty products in one clear theme is usually plenty. Too many choices can slow down your setup and confuse visitors; you can always add more once you see what sells.
Can I use my home address for Shopify and Spocket?
Yes, a lot of people do that in the beginning. You can change to a virtual office or warehouse address later if you want more privacy or need it for certain payment providers.
How much money do I need to start?
Expect to pay for Shopify after the trial, a Spocket plan after its trial, maybe a domain, and some ad spend if you’re not relying only on organic traffic. You don’t need to buy inventory upfront because suppliers ship each order for you.
What if a product runs out of stock on Spocket?
Because Spocket syncs inventory to Shopify, out‑of‑stock items should update on your store as long as that sync is active. If a winner disappears, look for similar products from other suppliers in the catalog and switch as fast as you can.


Launch your dropshipping business now!
Start free trial.avif)


Related blogs
.avif)
How to Set Global Pricing Rules on Spocket to Protect Your Margins
Learn how to configure Spocket pricing rules to protect your profit margins. Set global pricing rules, automate markups, and maximize dropshipping profits.

How to Increase Average Order Value in Your Dropshipping Store with Spocket?
Learn how to increase AOV dropshipping Spocket way. We share practical product positioning strategies, pricing, fulfillment tips.


Spocket Supplier Vetting Process: How Are Suppliers Approved?
Learn how Spocket vets its suppliers. Find out how suppliers are approved and what is the Spocket supplier vetting process. Full details inside.