Guide to Setting Up a WordPress Store for Handmade Products
Discover how to set up a WordPress store for handmade products. Learn to customize your site and manage sales effectively.


Are you thinking about selling your handmade products online? WordPress might just be the perfect dropshipping platform for you.
Known for its flexibility and ease of use, WordPress is ideal for generating content as well as making sales. With the right tools and plugins, you can turn a basic WordPress site into a thriving online store.
You can equip it with powerful tools like WooCommerce to manage sales, payments, and shipping.
Interested? Then keep reading to learn how to set up a WordPress store for handmade products.
Why Create a WordPress Store for Handmade Products?
When you sell on your own site, you get to call the shots. You can feature whatever dropshipping products you like and keep every penny of the profit, free from the restrictions and fees that marketplaces often impose.
Creating your own website lets you personalize the shopping experience. You choose the design and the features, which lets your brand truly stand out from the crowd. Marketplaces typically don't offer much in the way of customization, so having your own site could give you a competitive edge.
Think about the costs, too. Selling platforms like Etsy or eBay have their perks, but they also come with fees. For example, Etsy charges $0.20 just to list an item and then takes a 5% cut when you make a sale, not to mention payment processing fees if you use services like PayPal.
With your own site, you skip the listing fees and commissions. That's more profit in your pocket and more control over your business finances.
Steps to Create a WordPress Store for Handmade Items
1. Buy a Domain
When you’re launching a WordPress store for handmade products, choosing the right domain name is crucial. It should be catchy, memorable, and reflect your brand's unique vibe. You can register your domain with services like GoDaddy or Bluehost for $10 to $20. A good idea is to secure multiple domain extensions (.crafts, .store, etc.) to safeguard your brand identity. Need inspiration? Try our business name generator to spark some creative ideas.

2. Get Web Hosting
For your WordPress store, picking a reliable hosting provider is key. Companies like Bluehost and Hostinger offer plans specifically designed for eCommerce merchants, starting at roughly $6.99 per month. As your store grows, ensure your hosting plan can scale with your needs to handle increasing traffic smoothly.
Remember, the cost of getting your handmade products store running will depend on the choices you make regarding domain and web hosting. Opt for the essentials and take advantage of promotional offers to keep costs in check.
3. Install WordPress
WordPress is an excellent platform for setting up your online store. Many hosting providers offer a one-click installation, which simplifies the setup process considerably. Check with your host to see if this option is available.
Manual Installation of WordPress
If the one-click install isn't available, you'll need to manually set up WordPress:
- Download WordPress. Visit WordPress.org and click the Get WordPress button to get the latest version.
- Upload the files. Log into your hosting account and go to the File Manager. Navigate to the directory where you want to install WordPress, usually public_html. Upload the WordPress zip file you downloaded.
- Extract the files. Once uploaded, click on the zip file and select Extract to unpack the WordPress installation files. They will usually be placed in a folder named wordpress.
- Move the files. Move the files from the wordpress folder to the root directory or the intended installation directory. This typically involves selecting all the files, clicking Move, and specifying the destination folder.
- Create a database. From your hosting dashboard, go to the database section and create a new database. Add a user to this database with full privileges. Make sure to note the database name, username, and password.
- Run the installation. Visit your domain in a web browser to start the WordPress installation. Choose your language, and then input your database information. Click Let’s Go and follow the prompts to Run the installation.
- Configure your site. Enter your site title, create an admin username and password, and provide an admin email. Decide if you want to allow search engines to index your site immediately.
- Finalize the setup. Click Install WordPress. Once the installation is complete, you'll have a functional WordPress setup ready to be turned into an online store for handmade products.

4. Apply a Theme
WordPress offers a range of design possibilities with its vast selection of themes—both free and paid. These themes make it easy to give your site a stunning look without needing to code.
Each theme comes packed with its own set of customization options. You can tweak these to get just the right feel for your handicrafts store. And don't worry about mobile shoppers— all WordPress themes are designed to look great on any device.
Want something more unique? Consider building a custom theme for your WordPress store.
5. Get WooCommerce and Other Plugins
Plugins add essential features and functionalities to a WordPress website. For a handicrafts website, we'll need several key plugins:
- WooCommerce. WooCommerce is the leading plugin for adding e-commerce capabilities to your website. It's a comprehensive tool that transforms your site into a fully functional online store.
- Product Table for WooCommerce. While WooCommerce automatically creates a default product list page, it can be clunky and inefficient for users trying to find specific products. Product Table for WooCommerce offers a more streamlined and user-friendly table layout for displaying your products..
- Product Addons for WooCommerce: This plugin is essential for any handicraft store that offers personalized or custom products. Product Addons for WooCommerce allows customers to specify custom additions or preferences, making it a valuable tool for improving customer satisfaction and experience.
Getting WooCommerce to Work
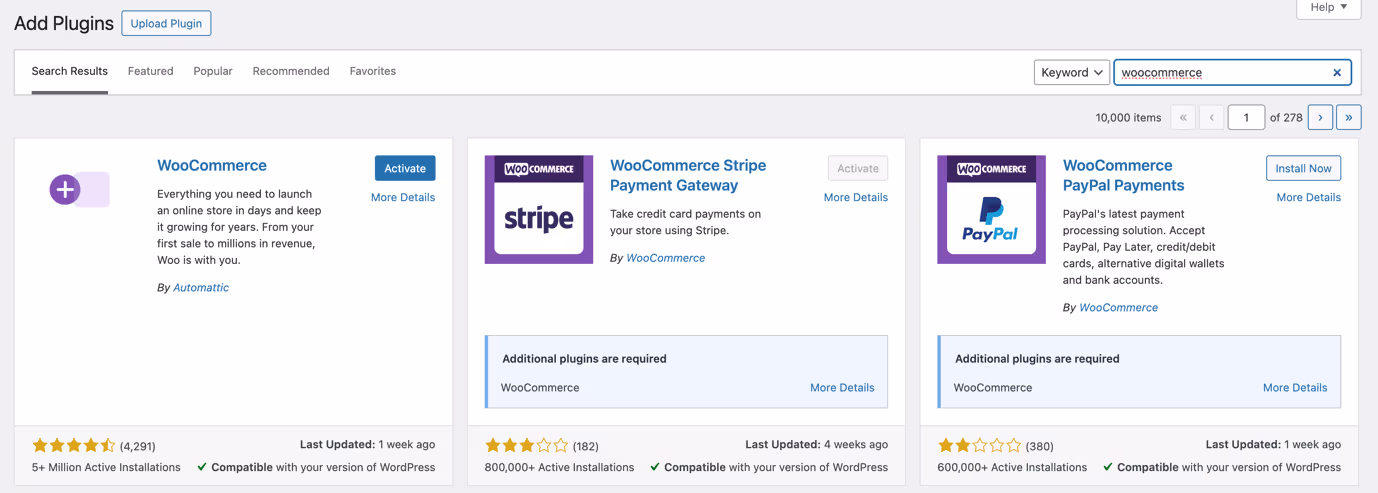
First up, head over to your WordPress dashboard and click on Plugins → Add New. In the search bar, type WooCommerce and hit enter. You'll spot the WooCommerce plugin pretty easily—make sure you install the right one by clicking the Install Now button.
Once it's installed, hit the Activate button that pops up in the same spot. This will launch the WooCommerce setup wizard. The rest of the journey is simple. The wizard will walk you through setting up the basics like your store location, currency, and what types of products you'll be selling—physical items, digital downloads, or maybe both.
6. Add Categories
When setting up your WordPress store for handmade products, it's essential to organize your items into categories right from the start. This organization helps customers navigate your store more effectively.
Here’s how you can set up product categories:
- Go to Products > Categories in your WordPress dashboard. You’ll see a default category called "Uncategorized." Since any product not assigned to a specific category automatically goes here, it’s good practice to rename this. Hover over "Uncategorized," click Quick Edit, and change the Name and Slug to something more relevant, like "Handmade Goods."
- To add a new category, enter a name that reflects the type of products you sell. For instance, if you specialize in handmade jewelry, you might name a category "Necklaces."
- Optionally set a slug, or leave it to automatically generate from the category name.
- If creating a subcategory, such as "Pendant Necklaces" under "Necklaces," choose the parent category from the dropdown.
- Click the blue Add New Category button to finalize the addition.
You can adjust the order of categories through drag-and-drop in the dashboard, influencing how they appear on your site depending on your theme.

7. Use Product Tags
Don’t forget about product tags—they’re great for linking similar items across different categories. If you have multiple items featuring a specific design, like a star pattern on various accessories, tag them with "Star Design" to help customers find all related items easily. Manage your tags under Products > Tags, create your tag, and assign it to the corresponding products.
Organizing your store this way not only helps customers navigate your site better but also improves their overall shopping experience.
8. Add Your Item
To add a product to WordPress, go to Products > Add New in your dashboard. First, name your product and assign it to a category. If you skip this step, it'll end up in the default “Uncategorized'” category, which doesn't look very professional.
Upload your main product image to the Product Image box. This is the primary image that shows up in shop listings and the shopping cart. You can add extra images in the Product Gallery to show more details and angles of your product.
Keep the short description and engaging because it appears right next to your product image. This is what customers see first, so it should highlight the key features of your product. The long description is for more detailed information and goes below the product image.
Make sure to set your product type to “Simple Product” if it doesn't have variations. In the Product Data section, you can set your price and if applicable, a sale price. Manage your stock under the Inventory tab and add shipping details under the Shipping tab if necessary.
The Linked Products tab is useful for promoting related items. For instance, if you’re selling a scarf, you might suggest a matching hat as an upsell or recommend a similarly patterned glove at checkout as a cross-sell.
Once everything is set, click the blue Publish button to make your product live
9. Choose a Table Layout
If you want your handmade products to really pop on your website, think about ditching the standard layout that comes with WooCommerce. A table layout lets your customers see all the important details right off the bat.
You can start by grabbing the WooCommerce Product Table plugin. Just install and activate it from your WordPress dashboard by going to Plugins > Add New and then searching for it. After it’s set up, go to WooCommerce → Settings → Products → Product tables to get everything just right. You'll probably want to display columns for image, name, description, price, and a buy button to make things clear for shoppers.
This plugin is handy because it changes the usual WooCommerce templates to a product table automatically. So, all your craft products will show up in an order form on your main shop page and category pages. Make sure to check the boxes in the Table display section to activate this layout on your store’s pages.
Don’t forget to click Save Changes when you’re done to make sure all your new settings take hold.
10. Allow for Personalization
If you're planning to sell customizable crafts in your shop, you can let customers personalize their orders. The WooCommerce Product Options extension is great for this—it lets folks add personal messages or choose engravings right on the product page using text boxes.
Plus, you can offer more choices with this extension. It allows you to include paid or free options through checkboxes, radio buttons, custom text inputs, and drop-down fields. Want to show off your crafts in style? Use a lightbox view to display products, giving customers a clear and detailed look at what they’re buying.
11. Set up Payments
You have several payment options to choose from to ensure convenience and security for both you and your customers.
Many store owners start with PayPal Standard, which directs customers to PayPal's secure site to complete their payment during checkout. You don’t need to have a PayPal account to use this method and can showcase your professionalism with the help of PayPal’s logo.
For those who prefer traditional methods, check payments allow customers to mail checks. Remember to verify the check before shipping the products.
Cash on Delivery (COD) is perfect if you’re also offering local pickup. You can rename this method to something like "Pay At DoorStep " if you want to process credit card payments in person.
Direct bank transfer is another secure option, transferring funds directly between bank accounts. It’s important to keep your bank details private, only showing them to customers upon order completion. Enabling this method might be safer if you disable Guest Checkout to prevent spam.
Want more variety? Consider integrating other payment gateways like Square PayPal Pro, or Stripe, or even offer trendy mobile payment options like Google Play and Venmo to cater to a broader audience.

12. Promote Your New Store
Launching your online shop for handmade goods means getting creative with how you promote it. Here are some fresh ways to catch eyes and spark interest:
- Leverage visual platforms: Instagram and Pinterest are perfect for showcasing handmade products. Use high-quality images and hashtags to draw in an audience who appreciates the beauty and uniqueness of handcrafted items.
- Craft workshops: Host online workshops or live demos where you teach a craft technique. This can attract people interested in learning and those curious about your products.
- Partner up: Collaborate with influencers who align with your brand. They can introduce your products to a broader audience in an authentic and engaging way.
- Local business collaborations: Team up with local businesses for pop-up events or feature your items in their shops. This can increase local visibility and draw a direct line to your online store.
- Utilize SEO: Optimize your website content for search engines. Focusing on niche keywords related to handmade goods can drive organic traffic to your shop.
These strategies go beyond the typical marketing playbook, offering you a chance to connect deeply with potential customers and grow your handmade business in meaningful ways.
Selling Your Own Products vs. Dropshipping
Selling your own products gives you complete control over the quality and branding of what you offer. You create and ship your own items, ensuring each piece reflects your unique style and commitment to craftsmanship.
Alternatively, dropshipping can be a less hands-on approach. Using tools like Spocket, you can sell pre-made products from a variety of categories without the need to hold inventory yourself. Spocket connects you with high-quality US and EU dropshipping suppliers, allowing you to sell high-quality products that turn a profit.

Ultimately, the choice between selling your own products and dropshipping comes down to personal preference and the amount of time you can dedicate. If you prefer creative control and have the capacity to manage stock, selling your own products is the way to go. If you aim to minimize overhead and avoid dealing with physical products directly, dropshipping might be your path to success.
Final Verdict
Congratulations. You've learned how to create a WordPress store for your handmade treasures.
Now you can start showcasing your unique creations and focus on crafting your brand's story. With your new online store, the world is your oyster—time to string those pearls of success!
WordPress Store to Sell Handmade Products FAQ
What do I need to start a WordPress store for handmade products?
To get started, you'll need a domain name, web hosting, and WordPress installed on your hosting account. Install the WooCommerce plugin to add eCommerce functionality, choose a theme that matches the aesthetic of your handmade products, and set up payment methods to process transactions.
How can I make my handmade products stand out on WordPress?
Consider using high-quality images and detailed product descriptions to highlight the craftsmanship and unique features of your products. Additionally, you can use plugins like WooCommerce Product Table or WooCommerce Product Addons to enhance product listings with options for customization, making each item feel special.
Are there any specific plugins recommended for a handmade product store on WordPress?
Yes, aside from WooCommerce for basic eCommerce capabilities, consider plugins like WooCommerce Product Addons for customizations, and a plugin like Yoast SEO to optimize your product pages for search engines. These can help enhance your product offerings and improve visibility.
How can I manage shipping for my handmade products through WordPress?
WooCommerce provides various shipping options that can be configured based on your needs. You can set flat rates, free shipping, or dynamic pricing based on the product weight or location of the customer. Integrating shipping plugins like WooCommerce Shipping can also automate and streamline the shipping process.
Start your dropshipping business today


Launch your dropshipping business now!
Start free trial


Related blogs

Top WordPress eCommerce Themes for 2026
Explore the best WordPress eCommerce themes for 2026. Compare WooCommerce themes by speed, design, features, and dropshipping potential.


Saba Mohebpour Didn't Stop at Spocket: His New $50M Fund, ILA Capital, Is Buying Up Shopify and Amazon Apps
After building Spocket into a major ecommerce platform, Saba Mohebpour is launching ILA Capital with a $50M strategy to acquire Shopify and Amazon apps powering modern ecommerce.


Top Trendsi Alternatives for Fashion Dropshipping
Explore the best Trendsi alternatives for fashion dropshipping, fast shipping, branding, Shopify integration, and reliable suppliers.